I know you have been wanting to know how to prepare the fabric before crocheting an edging on a baby blanket!
Meet Carole.
Queen of Crocheted Baby Blankets!
She is going to show you how she prepares her flannel before she crochets it.
And she will show you a simple edging.
This is not a Crochet Lesson though! Sorry!!
Wash flannel and dry in your dryer.
1. Tear fabric to get a straight edge. Do this to all four sides. A generous "Carole Size" blanket is 45"X 45". For a new born swaddling blanket - cut to measure 36"X36".
* You will need 1 1/4 yards of Flannel or for you can use plisse or Seersucker.
2. Round all the corners of the blanket with a pretty tea saucer or salad plate that measures about 6" to 8". Carole used an 8" salad plate here. Place the plate in the corner of the blanket to create your curve. 8" plate makes a gentle curve.
Mark, using a wash away fabric marker and cut out the rounded corners.
It is important to trim off the selvages and any fuzzy or ravely edges.
Go to your Sewing Machine - but take the thread out of the machine!
Set your stitch length between 2.5 to 3 depending on the thread size (and I think if you crochet loosely). Stitch a trial to see which works best for you.
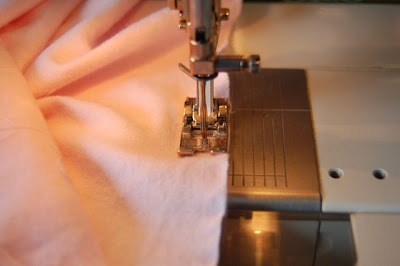
3. Carole used the sewing machine to help her punch holes into the fabric so she can easily insert her Crochet Hook in to the fabric and the even spacing has been done for her.
Line up the cut edge of the blanket about 3/8" away from the needle. Stitch (remember - without thread) all the way around the blanket.
She uses an OLD dull wing needle , saved just for this purpose. Stitch carefully around the blanket and don't stretch the blanket.
Next: She is will crochet.
But....
Oh look!! It's Tea Time.
We'll finish next post!! See you then.
All Designs Are Copyright Protected copyright 2011 Jeannie Baumeister


.jpg)


10 comments:
Thanks Jeannie...have to pass this on to my favorite crochet lady...she has spent time adding entredeux to edges!! LOVELY look, but time intensive...this sounds so easy. Just need hook size and thread used!! Thanks again!! HUGS> Karin
Can't wait for the next post. I just bought an antique HemStitcher and am anxious to try it out. ~janet
Thanks for the post. My mother and aunt used to make these blankets all the time. They gave several to my girls when they were little.
Thanks for the tutorial--I LOVE giving little blankets as baby gifts and new moms can't have too many!
I was given one of these at my baby shower and it's still my younger daughter's special blanket. :)
Genius - punching those holes with a wing needle. I'll be doing that for sure. I just made a plisse baby blanket, blue with just a white embroidered border. It's not too late for a crochet trim. Thanks to Carole for the instructions.
Thank you so much for the information on how to make the blanket. I have bought the supplies and was going to make one and here it is in your tutorial. Perfect timing. Thank you for sharing your skill Miss Carole. I am going to make a white blanket with white crochet edging for a little baby boy. Perfect gift. I also just love that little flower . Thank you Thank you.
Thank you so much - I have been wondering how your get clean holes in the fabric with even spacing and now I know. What stitch length does Carole use?
Debbi, Sorry I left that out!! I went back and put it in. The stitch length is 2.5 or 3.
Thanks, Jeannie!
Post a Comment